Contents
When it comes to maintaining your home, understanding essential DIY repair tips can save you time and money. From evaluating water damage to knowing which tools you’ll need, being proactive is key. Regular inspections and prompt action can prevent minor issues from escalating. But what steps should you take first? Let’s explore some practical techniques that will help you tackle repairs effectively and keep your home in top shape.
Key Takeaways
- Regularly inspect your home for water damage, mold, and leaks to catch issues early before they escalate.
- Keep essential repair tools organized, including moisture meters, caulk guns, and safety gear for efficient DIY repairs.
- Use eco-friendly cleaners for mold removal and ensure proper ventilation to control moisture in your home.
- Address water ingress by sealing windows, roofs, and plumbing fixtures to prevent future leaks and damage.
- Restore furniture by sanding surfaces, applying fresh finishes, and regularly maintaining materials to enhance longevity.
Assessing the Extent of Water Damage
How do you know if your home has suffered serious water damage? Start with a thorough water damage assessment.
Begin by conducting a visual inspection of your home. Look for signs like discoloration on walls, bubbling paint, or warped floors. These can indicate moisture buildup behind surfaces.
Don’t forget to check hidden areas like basements, attics, and crawl spaces, where water might linger unnoticed.
Pay attention to musty odors, which often signal mold growth. If you spot any leaks or water stains, it’s essential to pinpoint the source immediately.
Remember, the sooner you identify the problem, the easier it’ll be to prevent further damage.
Keep in mind that water damage can compromise your home’s structural integrity, so trust your instincts. If you feel uncertain about your findings, it’s wise to consult a professional.
Taking these steps will help you protect your home and create a safe, welcoming space for you and your loved ones.
Safety Precautions Before Starting Repairs
After evaluating the extent of water damage, you’re ready to start repairs, but safety should always come first.
Before diving in, make certain you’ve got the right personal protective equipment (PPE). Wear gloves, goggles, and a mask to protect yourself from mold and debris.
Next, address electrical safety. Turn off the power to affected areas at the circuit breaker to avoid any shocks while you work.
It’s also wise to use a voltage tester to verify that wires are safe before touching them.
Keep your workspace tidy and free from hazards to minimize the risk of accidents.
If you’re dealing with significant damage, don’t hesitate to call in professionals.
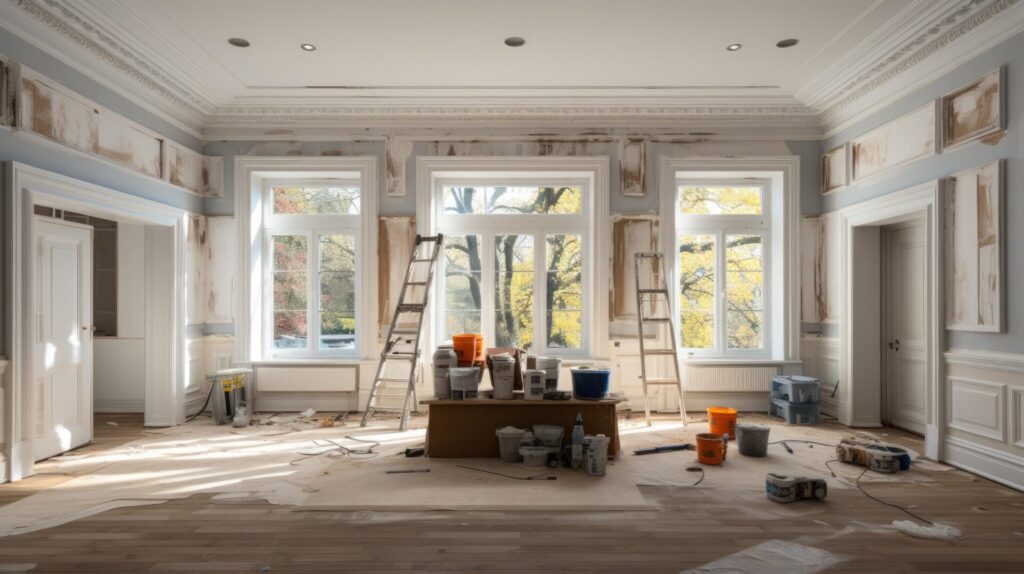
Essential Tools and Materials for Water Damage Repair
When tackling water damage repairs, having the right tools and materials is essential for a successful outcome. Start by picking up moisture meters; they’ll help you accurately assess damp areas and determine the extent of the damage. A good moisture meter ensures you’re not missing hidden issues.
Next, invest in quality waterproof sealants to protect your home from future leaks. These sealants create a barrier against moisture, keeping your spaces safe and dry.
You’ll also need tools like a utility knife, a caulk gun, and a sturdy ladder for accessing hard-to-reach areas. Don’t forget gloves and safety goggles to protect yourself while working.
Gathering these essentials makes the repair process smoother and helps you feel more confident as you tackle this challenge.
With the right tools in hand, you’re well on your way to restoring your home and ensuring its longevity.
How to Stop the Source of Water Ingress
To stop water ingress, you first need to identify the sources of leaks in your home.
Check areas like windows, roofs, and plumbing fixtures for any signs of moisture or damage.
Once you’ve pinpointed the problem spots, sealing those vulnerable areas will help protect your home from further water issues.
Identify Leak Sources
Have you ever wondered where that pesky leak in your home is coming from? Identifying leak sources is essential for maintaining your space.
Start with a thorough plumbing inspection; look for water stains, mold, or damp spots on walls and ceilings. Check under sinks and around appliances, as these spots often hide issues.
Use leak detection methods, like listening for dripping sounds or using moisture meters, to pinpoint the problem. Pay attention to high water bills, which could indicate a hidden leak.
Once you find the source, tackling repairs becomes easier. Remember, addressing leaks promptly can save you from more extensive damage and costly repairs down the line.
You deserve a dry, comfortable home!
Seal Vulnerable Areas
Although leaks can be tricky to locate, sealing vulnerable areas in your home is a straightforward way to prevent water ingress.
By using effective sealing techniques and waterproof materials, you can protect your space and create a comfortable environment for you and your loved ones.
Here are some key areas to focus on:
Windows and doors: Check for gaps and apply weatherstripping or caulk.
Roof joints: Inspect for cracks and use waterproof sealant to fill them.
Foundation cracks: Seal any visible cracks with epoxy or polyurethane.
Pipes and vents: Verify that all entry points are properly sealed with suitable materials.
Taking these steps safeguards your home and enhances its overall value.
Techniques for Drying Wet Areas Effectively
When dealing with wet areas in your home, the first step is to identify the affected spots so you can address them effectively.
Next, gather the right tools, like fans and dehumidifiers, to speed up the drying process.
Finally, promoting air circulation will help ensure that moisture doesn’t linger and lead to further issues.
Identify Affected Areas
To effectively tackle water damage, pinpointing the affected areas is vital.
Start by inspecting your home thoroughly to identify moisture sources. Look for signs like discoloration, peeling paint, or damp odors. It’s essential to assess the structural integrity to ensure your home remains safe.
Here are some practical steps to guide you:
- Check ceilings and walls for water stains.
- Inspect plumbing fixtures and appliances for leaks.
- Look behind furniture and under carpets for hidden moisture.
- Examine the foundation and basement for signs of seepage.
Use Proper Tools
Using the right tools can make all the difference when it comes to effectively drying wet areas in your home. Start with a high-quality wet/dry vacuum to remove excess water quickly. Invest in moisture meters to identify hidden damp spots, ensuring you tackle every issue.
Don’t forget fans and dehumidifiers; they can speed up the drying process considerably.
Keep your tools in good shape through regular tool maintenance, so they’re always ready when you need them. If your tools are organized, you’ll save time and frustration during emergencies.
Create a designated space for drying equipment, making it easy to grab what you need. By staying prepared and organized, you’ll foster a sense of belonging to a proactive home maintenance community.
Promote Air Circulation
After ensuring you have the right tools on hand, promoting air circulation is your next step in drying wet areas effectively.
Good ventilation strategies help moisture evaporate and improve air quality in your home. Here are some practical tips to get you started:
- Open windows and doors to create cross-ventilation.
- Use fans to direct airflow toward damp spots.
- Consider a dehumidifier to reduce humidity levels.
- Keep interior doors open to promote airflow throughout the space.
Removing and Replacing Damaged Flooring
Damaged flooring can be an eyesore and a hazard in your home, but tackling the repair doesn’t have to be intimidating.
First, identify your flooring type—whether it’s hardwood, laminate, tile, or vinyl. Each type has specific installation techniques that make removal and replacement easier.
Start by clearing the area and using a pry bar or utility knife to carefully remove the damaged sections. For hardwood, you might need to unscrew or lift boards; for tile, a chisel can help break the adhesive.
Once you’ve removed the damaged flooring, measure the space to cut new pieces accurately.
Secure the new flooring in place using the appropriate installation technique, whether that’s nailing, gluing, or clicking planks together.
Finally, verify everything is level and smooth for a seamless finish.
With a bit of patience, you’ll restore your space, making it feel like home again.
Repairing Water-Damaged Walls and Ceilings
When you notice water stains or peeling paint on your walls and ceilings, it’s essential to address the issue promptly to prevent further damage.
Ignoring water damage can lead to bigger problems down the line. Here’s a simple guide to help you with drywall repair:
Identify the source: Find and fix any leaks or moisture issues before starting repairs.
Remove damaged material: Cut out affected drywall sections and dispose of them properly.
Replace with new drywall: Install a new piece, securing it well and ensuring a tight fit.
Finish and paint: Tape, mud, and sand the area for a smooth finish, then repaint to blend with the surrounding surface.
Taking these steps will help restore your walls and ceilings, keeping your home looking great and maintaining its value.
Don’t hesitate to tackle these repairs; you’ve got this!
Dealing With Mold and Mildew After Water Damage
After water damage, mold and mildew can quickly take hold if you don’t act fast.
Start by identifying the affected areas in your home, then choose effective cleaning solutions to tackle the problem.
Finally, we’ll explore prevention strategies to keep your space mold-free moving forward.
Identify Affected Areas
Identifying affected areas in your home is essential for tackling mold and mildew that often follow water damage. Start by checking for water stains and damp spots, as these are clear indicators of moisture issues.
Use moisture meters to pinpoint hidden damp areas, ensuring you don’t miss any critical spots. Here are some key areas to inspect:
Basements and crawl spaces: Often the most susceptible to moisture.
Bathrooms and kitchens: High humidity can lead to hidden mold.
Around windows and doors: Check for leaks or condensation.
Behind appliances: Areas like your fridge can retain moisture unnoticed.
Effective Cleaning Solutions
To effectively combat mold and mildew after water damage, you’ll want to arm yourself with the right cleaning solutions.
Start by using eco-friendly cleaners, which are safer for your family and the environment. A simple homemade solution of equal parts water and white vinegar can be surprisingly effective. Just spray it on the affected areas and let it sit for a while before wiping it down.
For tougher spots, consider mixing baking soda with water to create a paste and applying it directly to the mold.
After cleaning, maintain proper ventilation to keep moisture at bay. Taking these steps helps restore your home and fosters a healthier living space for everyone.
You’re not alone in this—many homeowners face similar challenges!
Prevention Strategies Explained
While water damage can be a homeowner’s nightmare, implementing effective prevention strategies can greatly reduce the risk of mold and mildew taking hold.
By staying proactive with preventative maintenance and seasonal inspections, you can protect your home and your peace of mind. Here are some key strategies to keep in mind:
Inspect for leaks regularly to catch issues before they escalate.
Ventilate damp areas, like bathrooms and kitchens, to minimize moisture.
Clean gutters and downspouts to ensuere proper drainage away from your home.
Use dehumidifiers in high-humidity spaces to control moisture levels.
Restoring Furniture and Personal Belongings
Restoring furniture and personal belongings can breathe new life into cherished items, making them functional and beautiful once again.
Start with furniture refinishing; it’s a fantastic way to revive worn pieces. Sand the surface to remove old paint or varnish, then apply a fresh coat that matches your style. Don’t be afraid to experiment with colors or stains to create a unique look.
For upholstery repair, check for rips or faded fabric. You can either patch small areas or completely reupholster the piece, which allows you to choose the perfect fabric that complements your home. Remember to use high-quality materials to ensure durability.
Additionally, adding new hardware or accessories can enhance the overall appeal. Whether it’s a vintage chair or a beloved family heirloom, these restoration projects preserve memories and create a sense of belonging in your space.
Immerse yourself, and let your creativity shine!
Final Steps: Ensuring Long-Term Prevention
As you wrap up your restoration projects, it’s essential to think about long-term prevention to keep your furniture looking its best.
Maintaining your belongings isn’t just about the initial repairs; it’s about ensuring they stay in great shape for years.
Here are some practical tips for long-term maintenance:
- Schedule regular inspections to catch any issues early.
- Use protective finishes to shield surfaces from wear and tear.
- Avoid direct sunlight on your furniture to prevent fading.
- Clean and condition materials regularly to maintain their integrity.
Wrap-Up
By regularly inspecting for water damage, promptly addressing leaks, and maintaining proper ventilation, you can protect your home from ongoing issues. Equip yourself with the right tools, tackle repairs with confidence, and prioritize mold removal. Restore your belongings and reinforce your defenses against future damage. Remember, a proactive approach to maintenance ensures a healthier living environment, safeguards your investment, and provides peace of mind. Stay vigilant, stay prepared, and keep your home in top shape.
Recent Posts
What Are Key Dehumidification Techniques for Smoke Damage?
Smoke damage isn’t just about the charred surfaces; it often leaves behind considerable moisture that
Why Use Dehumidification for Smoke Damage Cleanup?
Smoke damage can linger long after the flames are extinguished, leaving behind residues that are
Top 3 Tips for Structural Drying After Water Damage
When faced with water damage, effective structural drying is vital to prevent further issues like