Contents
Many homeowners underestimate the urgency of immediate action when facing emergency water damage, often leading to more severe issues down the line. It’s vital to first assess the extent of the damage and guarantee personal safety before moving forward. Knowing the right techniques for swift water removal and effective drying can greatly mitigate risks. Understanding how to implement these methods correctly can save you time and money, so let’s explore the essential steps you need to take.
Key Takeaways
- Use moisture detection tools to assess affected areas and document damage thoroughly for insurance claims.
- Immediately control the water source and employ extraction equipment like submersible pumps or wet vacuums to remove standing water.
- Implement proper ventilation and deploy fans and dehumidifiers to accelerate drying and maintain humidity levels below 60%.
- Clean and sanitize all surfaces with disinfectants, paying special attention to porous materials to prevent mold growth.
- Install long-term solutions like sump pumps and waterproof sealants to mitigate future water damage risks.
Assessing the Extent of Water Damage
How can you accurately evaluate the extent of water damage in your property? Start by conducting a thorough water damage evaluation. Use moisture detection tools, like infrared cameras and moisture meters, to identify hidden damp areas. Begin in the most affected rooms—check walls, ceilings, and floors. Look for discoloration, warping, or any signs of mold growth, as these can indicate deeper issues.
Next, investigate the source of the water intrusion. Is it from a burst pipe, roof leak, or flooding? Understanding the origin helps in determining the damage’s severity. Document your findings with photos and notes to track the damage’s progression.
Finally, consult with restoration professionals if the damage seems extensive. They have specialized equipment and expertise to provide a thorough analysis and recommend appropriate remedial actions. By methodically evaluating the situation, you’ll gain clarity on the next steps to protect your property.
Ensuring Personal Safety and Protection
After evaluating the extent of water damage, prioritizing personal safety becomes paramount. Before entering the affected area, you should implement key personal safety measures. Wear protective equipment such as rubber boots, gloves, and masks to shield yourself from contaminants and hazardous materials. Confirm that electrical outlets and appliances are turned off to prevent electrocution.
Assess for structural instability; if necessary, use a sturdy support system to avoid collapse. Be cautious of slippery surfaces, and consider utilizing a flashlight to navigate dark spaces. If you encounter mold or other harmful substances, evacuate the area and consult professionals.
Establish a clear communication plan with your team to coordinate actions effectively. By adhering to these safety protocols, you not only protect yourself but also foster a sense of security among those involved. Remember, your well-being is essential as you tackle the restoration process together.
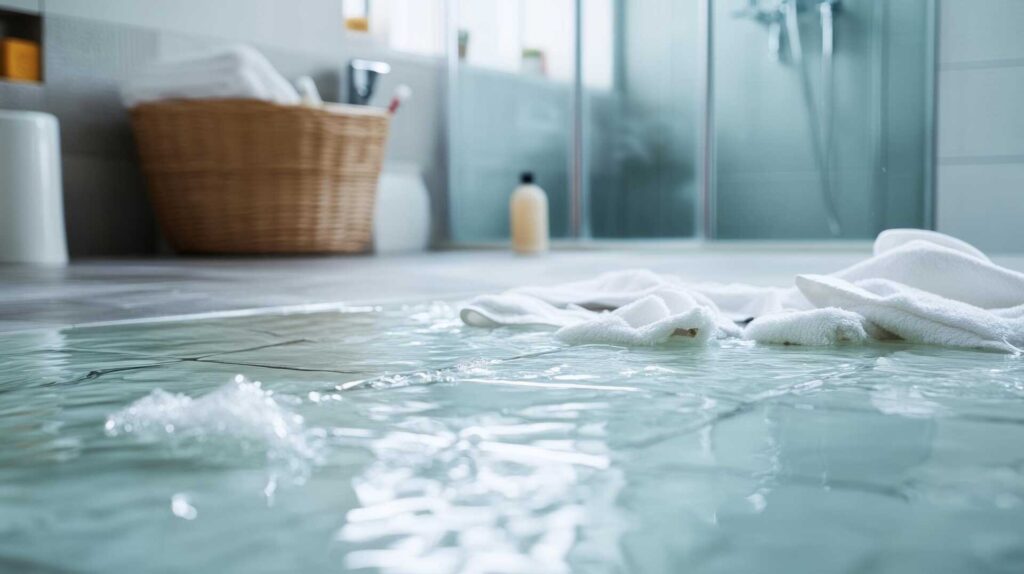
Immediate Water Removal Techniques
When faced with water damage, your first step is evaluating the water source to prevent further intrusion. Once you’ve identified and controlled the source, you can utilize extraction equipment, such as submersible pumps or wet vacuums, to remove the standing water efficiently. This immediate action is essential in minimizing damage and facilitating the restoration process.
Assessing Water Source
Why is identifying the source of water intrusion essential in emergency water damage restoration? Accurate water source identification is important for effective remediation. Start with a thorough plumbing system inspection to pinpoint leaks, ruptures, or faulty fixtures. Check visible pipes, joints, and appliances for signs of moisture or corrosion. Don’t overlook hidden areas like behind walls or under flooring, where water may accumulate unnoticed. If you suspect external sources, examine roofing, gutters, and drainage systems. Knowing the exact origin of the water allows you to implement targeted removal strategies, preventing further damage. By addressing the root cause promptly, you not only safeguard your property but also foster a sense of community and support among those facing similar challenges.
Utilizing Extraction Equipment
Once the water source is identified and addressed, immediate action is required to mitigate further damage. Utilizing extraction equipment is essential for effective water removal. You should select appropriate extraction methods based on the severity of water intrusion. Regular equipment maintenance guarantees peak performance and longevity.
| Extraction Method | Equipment Used | Key Benefits |
|---|---|---|
| Submersible Pump | Electric Submersible | Efficient for deep water |
| Wet/Dry Vacuum | Shop Vacuum | Versatile for various surfaces |
| Truck-Mounted Pump | High-Capacity Pump | Rapid large volume removal |
| Flooded Floor Pump | Specialized Pump | Ideal for saturated carpets |
| Portable Extractor | Compact Extractor | Easy maneuverability |
Drying and Dehumidification Methods
Effective drying and dehumidification methods are crucial in mitigating water damage, as they directly influence the recovery process. Start by implementing proper ventilation techniques; open windows and doors to enhance airflow. This reduces humidity levels and speeds up evaporation. Use fans strategically to direct airflow toward the wet areas, guaranteeing even drying throughout the space.
Next, deploy dehumidifiers to achieve moisture control. These devices extract excess moisture from the air, lowering humidity and preventing mold growth. Monitor humidity levels with hygrometers to verify they remain below 60%.
In addition, consider using heated air to accelerate drying. By raising the temperature, you can enhance evaporation rates and promote faster moisture removal. Combine these methods for ideal results, creating a thorough drying strategy that effectively restores your space while fostering a sense of community support and shared responsibility in recovery efforts.
Cleaning and Sanitizing Affected Areas
As you move forward with the restoration process, cleaning and sanitizing affected areas becomes essential to eliminate contaminants and prevent health risks. Start by removing any standing water and debris, then shift your focus to sanitizing surfaces. Use a mixture of water and a suitable disinfectant to wipe down all hard surfaces, making sure you cover corners and edges thoroughly. Pay special attention to porous materials; if they’re contaminated, consider disinfecting materials or replacing them entirely.
Next, utilize a fogger or spray bottle to apply disinfectants in hard-to-reach areas. Allow these solutions to dwell for the recommended time to effectively kill pathogens. After cleaning, guarantee proper ventilation to help surfaces dry quickly, which further reduces mold growth risks. By methodically sanitizing every affected area, you’re not just restoring your space but also safeguarding your health and that of your loved ones.
Repairing Structural Damage
To effectively repair structural damage, you need to first assess the extent of the damage. This involves inspecting walls, floors, and ceilings for signs of weakness or instability. Once you’ve determined the affected areas, you can focus on strengthening them to restore safety and integrity.
Assessing Damage Extent
How can you accurately assess the extent of water damage to guarantee a thorough repair of structural elements? Start by employing effective damage assessment techniques. Use visual inspection methods to identify visible signs of damage. Follow these steps:
- Inspect walls and ceilings for discoloration, warping, or cracks.
- Check flooring for buckling or softness, indicating potential structural issues beneath.
- Examine windows and doors for difficulty in opening or closing, which may signal structural shifts.
- Evaluate the foundation for cracks or moisture intrusion, as these can severely compromise stability.
Strengthening Affected Areas
Repairing structural damage is essential for ensuring the integrity and safety of your property after water exposure. Start by identifying compromised areas, like weakened beams or warped walls. Use strengthening materials such as steel braces or epoxy resins to stabilize these sections effectively. Reinforcing structures not only restores functionality but also prevents future damage. Make sure to replace any rotted wood, and consider using moisture-resistant alternatives to enhance durability. After reinforcing, inspect for any signs of mold growth and address them immediately to safeguard your health. This methodical approach not only repairs but also fortifies your property against future incidents, fostering a sense of security and belonging within your home. Remember, thoroughness in restoration is key to lasting safety.
Addressing Mold Growth Prevention
While addressing water damage, it’s important to implement effective mold growth prevention strategies immediately. Mold spores can become a significant issue if moisture control isn’t prioritized. Here are four vital steps you should take:
- Dry the Area: Use fans and dehumidifiers to remove excess moisture within 24-48 hours.
- Inspect for Hidden Moisture: Check behind walls and under floors to verify no damp spots remain.
- Seal Vulnerable Areas: Apply mold-resistant paints and sealants in areas prone to moisture.
- Maintain Airflow: Guarantee proper ventilation in your home by keeping windows open or using exhaust fans, especially in kitchens and bathrooms.
Documenting Damage for Insurance Claims
After taking steps to prevent mold growth, you’ll need to focus on documenting the damage for insurance claims. Proper photo documentation is essential for a successful claim submission. Capture clear, detailed images of all affected areas, including structural elements, personal belongings, and any visible water damage.
| Step | Action |
|---|---|
| 1. Assess Damage | Identify all affected areas |
| 2. Take Photos | Capture high-quality images |
| 3. Timestamp Photos | Use a date-stamped device |
| 4. List Damages | Create a detailed inventory |
| 5. Submit Evidence | Compile images and documentation |
Make sure to document any expenses incurred during the restoration process as well. This methodical approach not only supports your claim but also strengthens your case for reimbursement. Remember, thorough documentation can greatly impact the outcome of your insurance claim.
Implementing Long-Term Solutions and Prevention
To guarantee your property remains protected against future water damage, implementing long-term solutions and preventive measures is essential. Start by focusing on effective waterproofing methods and drainage solutions. Here are four key steps to take into account:
- Install a sump pump: This device helps remove excess water from your basement or crawl space, preventing flooding.
- Apply sealants: Use waterproof sealants on foundations and basement walls to block moisture penetration.
- Improve grading: Confirm your property slopes away from the foundation, directing water away and minimizing pooling.
- Maintain gutters and downspouts: Regularly clean and check these systems to guarantee water is efficiently channeled away from your home.
Final Thoughts
In summary, effectively restoring water damage requires a methodical approach, from immediate removal to long-term prevention. While some may worry about the complexity of these techniques, visualizing the process—like a flowchart that outlines each step—can simplify it. By following these proven techniques, you can guarantee your property is safely restored and protected against future water issues. Don’t underestimate the importance of each stage; your proactive measures today can save you significant costs and stress tomorrow.
Recent Posts
What Are Key Dehumidification Techniques for Smoke Damage?
Smoke damage isn’t just about the charred surfaces; it often leaves behind considerable moisture that
Why Use Dehumidification for Smoke Damage Cleanup?
Smoke damage can linger long after the flames are extinguished, leaving behind residues that are
Top 3 Tips for Structural Drying After Water Damage
When faced with water damage, effective structural drying is vital to prevent further issues like