Contents
You inspect water damage by first checking visible surfaces, then probing hidden areas where moisture can linger. You use moisture meters and thermal imaging to confirm readings, trace the intrusion source, and assess mold risk. You’ll also need to document every finding for insurance and mitigation. The water damage inspection key is knowing which signs matter most—and which ones signal that the damage is already spreading.
Key Takeaways
- Inspect visible and hidden areas for stains, warping, peeling paint, damp odors, and soft or swollen materials.
- Use a moisture meter and flashlight to measure suspect materials and document elevated readings consistently.
- Check walls, floors, ceilings, baseboards, and cabinets for cupping, buckling, discoloration, or mold growth.
- Trace moisture paths backward to find the leak source and identify contamination such as sewage, stagnant water, or chemicals.
- Photograph damage, record readings and serial numbers, and call restoration experts if insulation, drywall, or electrical systems are affected.
How to Inspect for Water Damage
Start by inspecting the affected area methodically, beginning with visible surfaces and then checking hidden spaces. You should note stains, warping, peeling paint, and damp odors, then trace each clue to its source.
Use a flashlight, moisture meter, and gloves to document readings and confirm whether materials still hold moisture. Check baseboards, flooring edges, window frames, and plumbing connections with steady, deliberate passes.
If you spot active seepage, isolate the area and stop further spread. Record findings clearly so your team can compare conditions and choose preventive measures that reduce repeat damage.
When the structure is dry enough, coordinate restoration techniques that match the material and severity. You’re not just identifying damage; you’re building a reliable assessment that helps your space recover safely and efficiently.
Find Hidden Signs of Water Damage
After you’ve checked the obvious surfaces, move into concealed spaces where water often lingers unnoticed.
You should inspect behind appliances, under sinks, inside cabinets, and along baseboards for staining, swelling, or paint that’s lifting.
Feel for soft trim, warped panels, and musty odors that point to hidden leaks.
Use a flashlight to trace darkened edges around plumbing penetrations, ventilation grilles, and window casings, since these areas often become moisture traps.
Look for rust on fasteners, mineral crust near joints, and discoloration that spreads in uneven patterns.
You’re not just hunting damage; you’re protecting your home with a careful team mindset.
When you document each clue methodically, you build a reliable picture of where water entered and where it may still be active.
Check Moisture Levels in Materials
Use a moisture meter to measure suspect materials and record the readings at each test point.
You’ll compare those values against normal baselines to identify elevated moisture that signals hidden intrusion.
You should also inspect for saturation signs such as softening, swelling, discoloration, or surface distortion.
Moisture Meter Readings
A moisture meter gives you a quick, reliable way to verify how much water remains in drywall, wood, subflooring, and other building materials.
Before you test, confirm moisture meter calibration against a known dry reference so your data stays consistent. Then place the probes or sensor firmly on each surface and record the baseline and elevated readings in the same room.
For accurate moisture reading interpretation, compare adjacent areas, material types, and unaffected sections you’ve already verified. You’ll spot patterns faster when you document values in a log and repeat measurements after drying intervals.
If readings stay above normal, keep your team aligned on the same inspection criteria so everyone makes decisions from the same numbers.
Material Saturation Signs
Surface clues often reveal material saturation before numbers do. You should inspect each area methodically, because different material types show distinct saturation indicators.
Drywall may darken, swell, or lose rigidity. Wood can cup, warp, or feel cool and dense. Carpet often hides moisture beneath a dry face, so press firmly and check backing. Insulation usually compresses and clumps when it’s soaked.
Concrete may show dark edges, efflorescence, or persistent coolness. You’ll want to compare affected surfaces with nearby dry sections, since contrast helps you confirm spread.
Listen for hollow sounds, note stains, and track soft spots at seams, corners, and baseboards. When you document these signs, you strengthen your team’s assessment and reduce missed damage.
Inspect Walls, Floors, and Ceilings
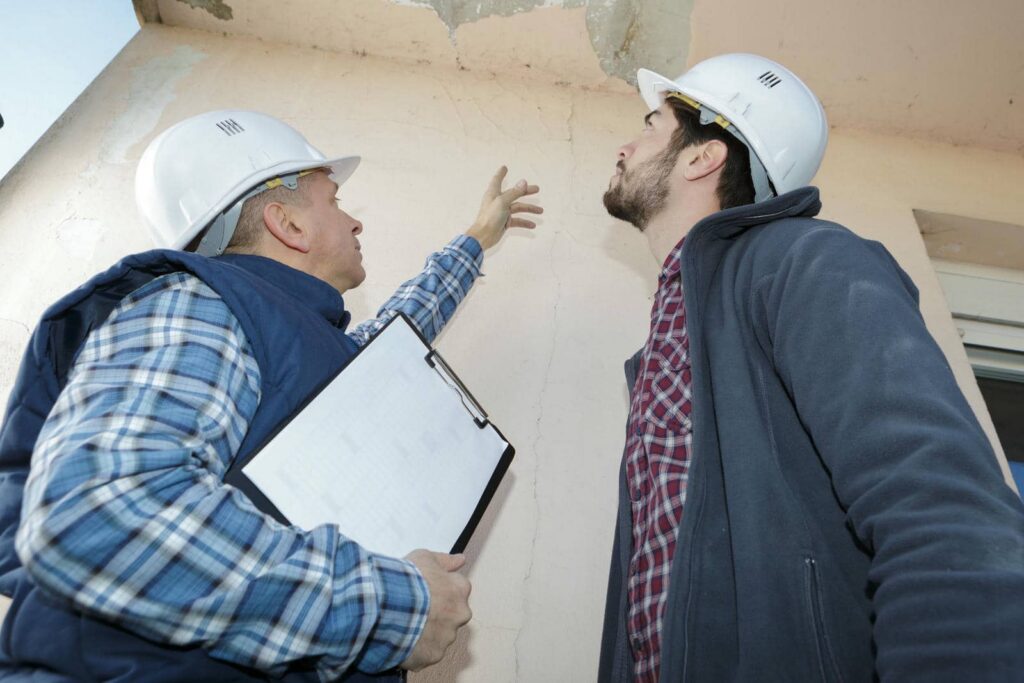
Start by inspecting walls, floors, and ceilings for staining, swelling, warping, peeling paint, soft spots, and any signs of mold growth.
You’ll want to compare damage patterns across wall material types, because drywall, plaster, and paneling react differently to moisture. Press gently to test firmness, and note any deflection or surface separation.
Check flooring durability by observing cupping, buckling, or delamination in tile, wood, laminate, or vinyl. Use a flashlight to review ceiling joints and corners for discoloration or sagging.
Measure and document each affected area so your team can stay aligned on severity and next steps.
Keep your findings organized, because precise inspection helps you protect the space and make confident decisions together.
Trace the Source of Water Intrusion
Trace the leak origin by following visible moisture paths backward to the highest wet point and the first affected material.
Check all entry points, including roofs, windows, plumbing penetrations, HVAC condensate lines, and foundation joints, for active seepage or staining.
Use targeted inspection and moisture readings to confirm the source before you begin repairs.
Identify Leak Origins
Where’s the water coming from? You pinpoint the origin by comparing moisture patterns, staining direction, and material response.
Start with leak detection methods such as thermal imaging, moisture meters, and pressure testing, then confirm findings with visual inspection. Use plumbing inspection tips to evaluate supply lines, drain joints, valves, and fittings for active seepage or intermittent dripping.
Track the highest concentration of dampness back toward the earliest affected surface, since gravity and capillary action usually create a clear path.
If you’re working with a team, share observations and note each measurement so everyone stays aligned. Document temperatures, humidity, and readings at each point.
When you isolate the source, you can move forward confidently, protect the space, and help everyone involved feel informed and included.
Check Entry Points
Once you’ve identified the likely leak origin, inspect the entry points where water can bypass the building envelope. Check windows, doors, roof penetrations, vents, utility chases, and wall joints in a fixed sequence.
Look for failed caulk, cracked flashing, loose fasteners, warped frames, and gaps around sealant lines. Verify that gutters, downspouts, and drainage paths move water away from the structure.
If you find staining or active seepage, map the path and confirm whether entry point security is compromised by wind-driven rain or capillary action.
Document each defect with photos and measurements, then compare them against current weatherproofing measures.
You’ll protect your team’s shared standard when you isolate the exact breach, because precise tracing prevents repeated damage and supports a reliable repair plan.
Check for Structural Safety Risks
Before you inspect finishes or fixtures, you should confirm that the structure remains safe to enter and evaluate.
Walk the site methodically and look for sagging ceilings, bowed walls, displaced framing, and cracked slabs. Check load-bearing members, columns, joists, and roof lines for deflection or separation. If you see active movement, stop and secure the area.
Verify foundation integrity by noting settlement, step cracking, and moisture-related erosion at the base. Assess structural stability by comparing adjacent surfaces, testing for vibration, and confirming that doors and windows still align.
Use PPE, limit occupancy, and document every hazard with photos and notes. When you work this way, you help protect your team and maintain a shared standard of safe, reliable assessment.
Identify Mold and Contamination Hazards
You should inspect all affected surfaces for visible mold growth, noting discoloration, musty odor, and any spreading patterns around wet materials.
Next, you should identify the contamination source by tracing the water path, checking for sewage, stagnant water, or chemical exposure.
If you confirm contamination, you’ll need to isolate the area and treat it as a health hazard.
Visible Mold Growth
Visible mold growth usually signals prolonged moisture exposure and a likely contamination hazard, so inspect affected surfaces carefully and document the extent, color, texture, and location of the growth.
You should treat fuzzy patches, staining, and musty odor as clear indicators of elevated health risks. Use mold prevention strategies that limit humidity, improve drying, and isolate affected materials during assessment.
Stay methodical so you and your team can compare findings consistently and feel confident in the same standard.
- Green or black colonies on drywall
- White film on framing or subfloors
- Dark spotting around baseboards
- Damp, warped materials with residue
Confirm visible growth only after close lighting checks, then note whether the surface remains wet or crumbly.
Contamination Source Identification
Trace each contamination source back to the wettest materials first, because hidden mold often begins in cavities, insulation, and porous assemblies that stayed damp after the initial event.
You should map contamination types by room, material, and moisture path, then verify odors, staining, and microbial growth with targeted probing and moisture readings.
Check drywall, carpet pad, wood framing, HVAC returns, and contents that may have wicked water.
Classify hazards as biological, sewage-related, or chemical, since each carries different health risks and cleanup requirements.
If you detect contamination under floors or behind finishes, isolate the area and document it before disturbance.
Document Water Damage for Insurance
Start documenting water damage as soon as you discover it, because insurers rely on clear, time-stamped evidence to assess the claim. You should photograph every affected area from wide and close angles, then log the date, room, and visible condition.
For insurance claims, keep your records organized in one folder so you can share them quickly with adjusters. Use these documentation tips to strengthen your file and support your case:
- Capture ceiling stains, warped flooring, and wet insulation.
- Record serial numbers for damaged appliances and equipment.
- Save receipts for cleanup supplies, temporary repairs, and rentals.
- Note witness names, contact details, and inspection observations.
Your careful recordkeeping helps you belong in the process with confidence, gives your claim structure, and reduces disputes during review.
Prioritize Water Damage Mitigation Steps
Once you’ve documented the damage, move quickly to limit further loss and stabilize the property.
Start your emergency response by shutting off water, electricity, and gas where safe, then remove standing water with pumps, wet vacuums, or absorbent materials.
Protect belongings by moving them to dry, elevated spaces and placing barriers around affected rooms.
Open windows and run fans or dehumidifiers to reduce moisture, but only if they won’t spread contamination.
Inspect structural materials for saturation and mark areas that need drying.
Apply preventative measures by sealing minor entry points, setting up drainage paths, and monitoring humidity levels.
Stay organized, work methodically, and communicate clearly with everyone on site so your team can act as one.
Prioritize tasks by risk, then verify conditions before you advance.
Know When to Call Restoration Experts
If water has soaked insulation, drywall, subflooring, or electrical systems, you should call restoration experts immediately because they can assess hidden damage and prevent secondary problems like mold, structural decay, and unsafe wiring.
You’ll get a clear expert consultation that defines scope, equipment, and safety controls, so you’re not guessing. Their restoration timeline helps you coordinate drying, demolition, and repairs with confidence.
- Moisture meters confirm trapped water behind surfaces.
- Thermal imaging reveals concealed leaks and wet cavities.
- Air movers and dehumidifiers stabilize conditions fast.
- Sanitizing protocols reduce contamination risks for your team.
When you act early, you protect the structure, preserve belongings, and stay aligned with a proven recovery plan.
Frequently Asked Questions
How Soon Should I Inspect After a Water Leak?
Inspect immediately after you stop the leak; you’ll catch hidden moisture fast. Use leak detection and moisture mapping within hours, then recheck after 24 to 48 hours to confirm drying, prevent mold, and protect your space.
What Tools Detect Hidden Moisture Most Accurately?
Moisture meters and thermal imaging detect hidden moisture most accurately. You’ll get the best results by combining both, because one measures material content, and the other reveals temperature anomalies behind surfaces, helping you confirm suspected wet zones.
Can Water Damage Affect Electrical Systems Safely?
Yes—water damage can affect electrical systems, and you shouldn’t assume they’re safe. You’ll need electrical safety checks and moisture detection first; hidden corrosion can fail later, so test methodically before restoring power, together.
How Do I Estimate Repair Costs From Damage?
You’ll estimate repair cost by documenting each damaged area, measuring scope, and getting itemized contractor quotes. Use a detailed damage assessment to compare materials, labor, and hidden issues, so you can budget confidently and stay included.
What Should I Do Before an Inspector Arrives?
You should follow a pre inspection checklist: stop the source, document damage, move valuables, ventilate, and preserve materials. During emergency response, you’ll feel prepared, supported, and ready for the inspector’s assessment.
Conclusion
You can protect your property by inspecting damage methodically, checking hidden areas, and tracing the intrusion source before cleanup. Use moisture meters and thermal imaging to confirm affected materials, and document every finding for insurance. If you detect mold, contamination, or structural risk, call restoration experts immediately to limit loss and support safe remediation.
Recent Posts
Why Evaluate Water Damage? Essential Assessment Techniques
You need to evaluate water damage first because the visible stain rarely shows the full
What Are Effective Techniques for Evaluating Water Damage?
You may not realize that visible staining is often the least reliable clue in water
How to Effectively Assess Water Damage
For water damage, you need to trace the source fast, verify safety before you enter,