Contents
You may not realize that visible staining is often the least reliable clue in water damage assessment. You need to check moisture with a meter, inspect walls and floors for hidden saturation, trace the leak source, and test material integrity for swelling or softening. Musty odors and mold can confirm ongoing moisture. Careful documentation helps with claims, but the real question is which damage demands immediate action first.
Key Takeaways
- Inspect for visible signs like stains, swelling, warping, peeling paint, and musty odors on walls, wood, and drywall.
- Use a moisture meter to confirm saturation, compare readings, and map moisture spread systematically.
- Check hidden areas such as wall cavities, baseboards, subfloors, and nearby rooms for concealed damage.
- Trace the leak source by following moisture paths from the highest wet point to pipes, joints, roofing, or valves.
- Document all damage with photos, measurements, and notes, and call professionals for contamination, mold, or structural concerns.
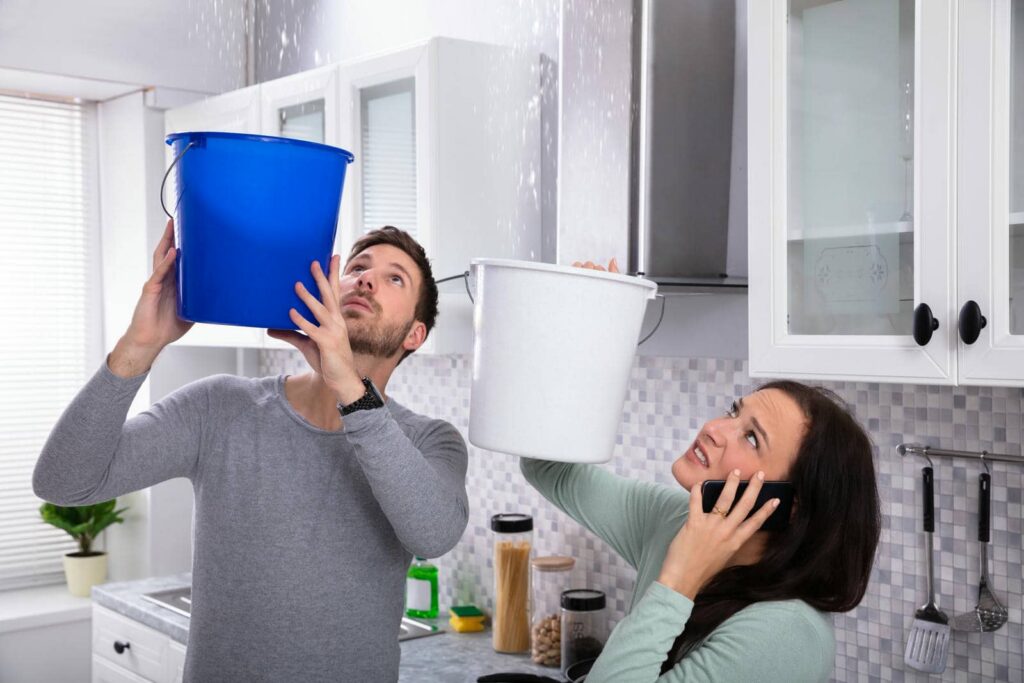
What Does Water Damage Look Like?
Water damage usually shows up as discoloration, swelling, warping, or staining on surfaces like drywall, wood, ceilings, and flooring.
You may also see water stains that ring outward, darker patches around joints, or a musty residue near the affected area.
On painted surfaces, peeling paint often starts at edges, corners, or seams where moisture has weakened adhesion.
You can spot bubbling wallpaper, softened trim, cupped boards, and sagging ceiling materials as the damage progresses.
Pay attention to changes in texture, because damp materials often feel spongy, crumbly, or uneven.
If you’re inspecting your space, trust these visual cues and act quickly. They help you identify problems early, protect your home, and stay informed alongside others who manage repairs well.
Check Moisture With a Meter
Use a moisture meter to confirm how far the damage has spread. You’ll get objective readings that help you separate damp spots from fully saturated materials. Set the device to the right mode for wood, drywall, or masonry, then compare suspect areas with a dry baseline nearby.
Move in a grid so you can map moisture changes and spot patterns fast. If readings stay elevated, you’re not guessing—you’re using reliable detection techniques to guide your next step.
Moisture meters also help you verify when drying progress is real, not just surface-level. Keep notes on each reading, and repeat checks at the same points so your data stays consistent.
With this method, you can work confidently and feel like you’re handling the issue with your crew.
Find Hidden Water Damage in Walls and Floors
Where’s the damage hiding? You’ll often find it in wall cavities, baseboards, subfloors, and around trim where moisture travels unnoticed.
Scan suspect areas with thermal imaging to spot cooler patches that suggest saturation, especially after the surface looks dry. Press on drywall and flooring; soft spots, swelling, or slight movement often signal hidden leaks.
Check painted surfaces for bubbling, discoloration, and seam separation, since water can collect behind finishes before you see staining.
In shared buildings, compare adjacent rooms so you can distinguish one isolated issue from a wider pattern. Use a flashlight at low angles to expose warping and edge lifting.
When you document these signs carefully, you join a crew that catches damage early, limits repair costs, and protects the structure’s integrity.
Trace the Source of the Leak
You need to locate the leak origin by checking the highest visible moisture point and tracing back to the first sign of intrusion.
Inspect water paths along pipes, joints, roofing, windows, and penetrations to identify how the water’s traveling.
Once you map the route, you can isolate the source and target the correct repair.
Locate Leak Origin
Start by tracing the leak to its highest visible point, because water often travels away from the actual breach before it shows up as staining or pooling.
You should then mark each suspect area and compare dampness patterns, fasteners, seams, and penetrations to isolate the origin.
Use leak detection tools to confirm moisture levels, and pair that data with a focused plumbing inspection of supply lines, valves, fittings, and appliance connections.
If you find corrosion, mineral deposits, or swelling, document them immediately.
You’re not guessing; you’re narrowing the field with methodical checks that help your team work confidently.
Keep notes, photos, and measurements so everyone can review the same evidence and agree on the most likely source before repairs begin.
Inspect Water Paths
Trace the water’s route from the highest wet point to the visible damage, because gravity, framing cavities, and surface finishes can redirect it before it appears below.
You should map each stain, warped seam, and swollen board, then compare them with nearby plumbing, roofing, and exterior penetrations.
Check for capillary tracking along framing, insulation, and fasteners, since water often travels farther than you expect.
Read flood patterns on floors and walls to see where water pooled, then identify the low points that held it longest.
Inspect drainage systems for blockages, backflow, or failed slope, especially near gutters, downspouts, and site grading.
Use a flashlight, moisture meter, and photos to document each path.
When you trace the full route, you’ll make faster, more accurate repair calls together.
Assess Material and Structural Damage
Begin by inspecting the affected materials and structural elements to determine the extent of compromise, including swelling, warping, delamination, corrosion, cracking, and loss of load-bearing capacity.
You should test material integrity by probing drywall, flooring, framing, and insulation for softness, separation, or distortion.
Check structural stability at joists, studs, beams, subflooring, and fasteners, and note any deflection, rotation, or settlement.
Use a flashlight, moisture meter, and straightedge to confirm whether surfaces remain plumb, level, and sound.
If you’re part of a restoration team, document each defect with measurements and photos so everyone can act on the same facts.
Flag any area that feels unsafe, and restrict access until a qualified professional verifies it.
Check for Mold and Odor
You should inspect damp surfaces, hidden cavities, and insulation for visible mold growth, including discoloration, spotting, and fuzzy colonies.
You should also note any musty odor, since it often signals active moisture intrusion even when you can’t see mold.
If you detect either sign, document the area and treat it as a likely contamination source.
Mold Growth Signs
Check damp areas for visible mold, musty odors, and any discoloration on walls, floors, baseboards, or insulation, since mold often appears within 24 to 48 hours after water exposure.
You should inspect seams, corners, and hidden cavities with a flashlight and a moisture meter. Look for fuzzy, slimy, or powdery growth in white, green, black, or gray tones. These mold identification techniques help you confirm active growth and separate it from dirt or staining.
If you spot soft drywall, warped trim, or damp insulation, treat the area as suspect. Photograph findings, mark affected zones, and isolate them from clean spaces.
Strong mold prevention strategies include rapid drying, controlled humidity, and removing wet materials before colonies spread. When you act quickly, you protect your space and your team.
Musty Odor Clues
What does a musty odor tell you after water intrusion? It usually signals active microbial growth or trapped moisture in hidden materials.
You should trace odor sources near baseboards, under flooring, inside wall cavities, and around HVAC returns. If the smell strengthens in closed rooms, you likely have persistent dampness that hasn’t dried fully.
Use your nose as a diagnostic tool, but confirm with a moisture meter and visual inspection. Don’t ignore slight odors; early detection helps you protect the space and stay ahead of damage.
When you and your team identify the source quickly, you can target drying, cleaning, and removal before mold spreads. A clean, dry structure shouldn’t smell earthy or stale.
Treat any lasting musty note as a warning sign.
Document the Damage for Insurance Claims
Before any cleanup starts, document every visible sign of water damage so your insurance claim has a clear, defensible record.
Take dated photos and video of walls, floors, ceilings, baseboards, trim, and belongings from wide and close angles. Note moisture lines, discoloration, warping, staining, and any active leaks.
Keep insurance documentation organized: list room names, affected materials, and estimated dimensions of each damaged area. Save receipts for emergency supplies, dehumidifiers, and temporary housing, because the claim process often needs proof of loss and mitigation.
Back up files in the cloud and on a second device so nothing gets lost. If you’re working with a restoration team, share the same records, label everything consistently, and stay in sync.
Clear, complete evidence helps you feel supported and makes adjuster review faster.
Decide What to Repair First
With your damage documentation in hand, sort repairs by urgency so you can stop further deterioration and protect the structure first.
Start with active leaks, saturated framing, and compromised electrical components, since they can spread damage fast and raise safety risks.
Next, address wet insulation, warped subflooring, and drywall that’s lost structural integrity.
Then move to finish materials you can save, like trim, paint, and flooring.
Use moisture readings to rank each area, not guesswork. This keeps your repair priorities clear and helps you use labor and materials efficiently.
Balance cost considerations against performance: fix what preserves the building envelope before cosmetic work.
If you’re working with your crew or family, align on the plan so everyone knows what matters most and why.
When to Call Water Damage Restoration Experts
Call water damage restoration experts as soon as the loss involves contaminated water, hidden moisture in walls or subfloors, widespread saturation, or any sign of structural, electrical, or mold risk.
You’ll protect your property faster when you trigger an emergency response instead of waiting for conditions to worsen.
If drywall feels soft, flooring cups, insulation stays wet, or odors persist after surface drying, you need professional water restoration tools and diagnostics.
Experts use moisture meters, thermal imaging, extraction equipment, and containment protocols to verify what you can’t see.
You’re not overreacting; you’re joining a team that knows how to stabilize damage, reduce secondary losses, and document the issue correctly.
Call immediately after storms, sewage backups, burst pipes, or sprinkler failures.
Frequently Asked Questions
How Quickly Should Water Damage Be Inspected After Flooding?
You should inspect water damage within 24 hours of flooding. Your flood assessment and inspection timeline need to start immediately, so you can limit mold growth, document losses, and protect your home and community quickly.
Can Water Damage Affect Electrical Systems Safely?
Yes—water damage can compromise your electrical systems safely only after you’ve isolated power and verified dryness. You should use moisture detection, test for corrosion, and check breakers, outlets, and wiring before restoring electrical safety.
What Tools Help Detect Moisture Behind Tile?
You can detect moisture behind tile with moisture meters and thermal cameras. You’ll scan grout, edges, and adjacent walls, then compare temperature patterns and resistance readings to pinpoint hidden dampness before you remove any tile.
Does Insurance Cover Gradual Water Damage?
Usually not; insurers often deny gradual damage. You’ll need insurance claims evidence proving sudden loss, since policies cover accidental events, not long-term leaks. Check exclusions, document damage, and act fast—you’re not alone in this.
How Do I Prevent Future Leaks After Repairs?
You’ll prevent future leaks by scheduling routine inspections, performing plumbing maintenance, adding leak detection sensors, and applying waterproofing solutions around vulnerable joints. You’ll catch issues early, protect your home, and stay confident with your repair team.
Wrap-Up
So, after you’ve played detective with stains, meters, walls, and that delightful swampy odor, you can finally admit water damage isn’t “just a little damp.” You inspect, document, triage, and repair like a pro—because pretending the ceiling is “probably fine” rarely ends well. If you spot widespread saturation, mold, or structural weakness, don’t improvise heroics. Call restoration experts and let them save your house from your own optimism.
Recent Posts
Top 3 Sewage Cleanup Safety Tips
Sewage Cleanup should always begin with safety, as sewage-contaminated water can pose serious health risks.
7 Best Practices for Sewage Cleanup Safety
Sewage Cleanup requires a careful, step-by-step approach to protect your health and prevent further contamination.
10 Best Guidelines for Water Damage Cleanup
Water can race across a floor like a silent spill, slipping into walls and seams