Contents
When faced with water damage, you need a systematic approach to structural drying. Start by evaluating the extent of the damage to understand the situation. Removing standing water is your first priority, followed by implementing industrial fans for airflow. Each step plays a critical role in preventing further issues, and knowing the best methods can make a significant difference. Let’s explore these techniques to ensure your space is thoroughly dried and protected.
Key Takeaways
Assess and remove standing water using pumps and wet vacuums to prevent further damage and facilitate drying.
Utilize industrial fans strategically positioned to enhance airflow and promote quicker moisture evaporation from affected surfaces.
Employ dehumidifiers appropriate for the environment to effectively reduce humidity levels and capture residual moisture.
Remove saturated materials like carpets and drywall, ensuring proper disposal and safeguarding against mold growth.
Monitor drying progress with moisture meters and hygrometers to track moisture levels and adjust drying methods as needed.
Assessing the Extent of Water Damage
When you encounter water damage, evaluating its extent is vital for effective remediation. Start with water source identification, as understanding where the water originated helps in targeting your assessment accurately.
Look for visible signs like staining, warping, or mold growth. Use damage assessment techniques such as moisture meters and thermal imaging to uncover hidden moisture behind walls or under flooring. This thorough approach allows you to gather data on moisture levels and structural integrity.
Document your findings to create a clear picture of the damage. Assess affected materials, including drywall, insulation, and flooring, to determine if they can be salvaged or need replacement.
Removing Standing Water
To effectively remove standing water, start by evaluating the water level in the affected area to determine the best approach.
Utilize pumps for larger volumes of water, ensuring they’re set up correctly for maximum efficiency.
For smaller amounts, wet vacuums can be employed to extract residual moisture thoroughly.
Assess Water Level
As you begin the process of removing standing water, accurately evaluating the water level is essential for determining the most effective removal strategy.
Start by conducting a thorough assessment of the flood impact in your space. This will guide your next steps. Here are three key actions to take:
Use a Water Level Measurement Tool: Employ a reliable device to gauge the height of standing water.
Identify Affected Areas: Mark areas with varying water levels to prioritize removal efforts.
Document Conditions: Record the measurements and conditions to track changes over time and inform further actions.
Use Pumps Effectively
Using pumps effectively is essential for swiftly removing standing water and minimizing damage to your property.
Start by selecting the right pump types for your situation; submersible pumps are ideal for deep water, while utility pumps work well for shallow areas.
Make certain you conduct regular pump maintenance, checking hoses for clogs and ensuring the motor operates efficiently. Before use, inspect the power supply to avoid electrical hazards.
Set up the pump in the lowest area to maximize water removal, and monitor its operation to prevent overflow.
Once the bulk of the water is removed, make sure to keep the area ventilated to enhance drying.
Employ Wet Vacuums
Wet vacuums are invaluable tools for removing standing water after a flood or leak, especially in areas that a pump can’t reach.
To effectively employ wet vacuum techniques, follow these steps:
Choose the Right Wet Vacuum: Select a model suited for your specific needs, considering tank size and suction power.
Prepare the Area: Clear obstacles and make certain the vacuum hose reaches all affected areas for maximum efficiency.
Perform Regular Maintenance: Clean the filters and check for clogs to ensure your wet vacuum operates at peak performance during the drying process.
Using these methods will help you efficiently remove water and prevent further damage.
Utilizing Industrial Fans
When addressing water damage, utilizing industrial fans is essential for effective drying.
You’ll need to take into account the various types of fans available and their specific applications, as well as strategic placement to maximize airflow.
Properly positioned fans can greatly enhance evaporation rates and expedite the drying process.
Types of Industrial Fans
Industrial fans play an essential role in the structural drying process following water damage, with several types available to meet specific needs.
Understanding the different types of fans can enhance fan efficiency, ensuring ideal drying conditions. Here are three common types:
Axial Fans: These fans move air parallel to the axis of the fan, providing high airflow rates and effective moisture removal.
Centrifugal Fans: Ideal for higher pressure applications, these fans draw air in and expel it at a right angle, making them suitable for confined spaces.
Blower Fans: These fans deliver concentrated airflow, perfect for directing air into hard-to-reach areas or drying specific surfaces.
Placement Strategies for Efficiency
Proper placement of industrial fans is essential for maximizing drying efficiency after water damage. To achieve ideal results, you’ll want to establish effective placement patterns that target specific drying zones.
Start by identifying the most affected areas, ensuring fans are positioned to promote airflow across these zones. Place fans in a triangular configuration to enhance circulation and avoid dead air pockets.
Additionally, angle the fans toward surfaces that retain moisture, such as walls and floors. As you adjust fan positions, monitor the drying progress; you may need to reposition them to maintain airflow efficiency.
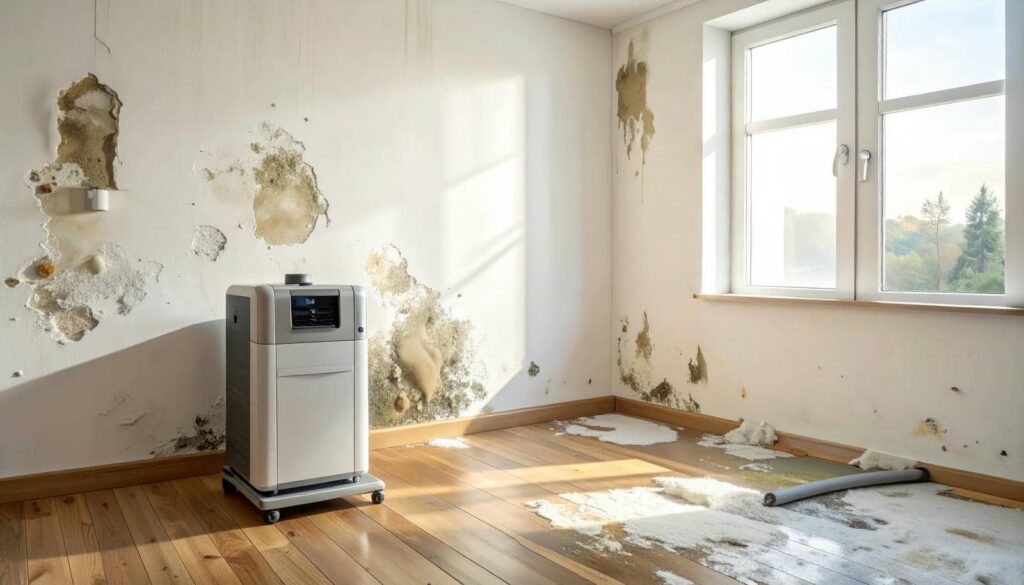
Employing Dehumidifiers
Utilizing dehumidifiers is essential in the structural drying process following water damage, as they effectively reduce humidity levels and expedite evaporation.
These devices come in various dehumidifier types, each suited for specific environments and moisture levels. For ideal humidity control, consider the following:
Refrigerant Dehumidifiers: Ideal for warmer areas, they cool air to condense moisture.
Desiccant Dehumidifiers: Perfect for colder environments, they use absorbent materials to capture moisture without cooling.
Whole-House Dehumidifiers: Designed to manage humidity levels throughout an entire space, ensuring consistent drying.
Opening Windows and Doors
Opening windows and doors can greatly enhance the drying process after water damage by promoting air circulation and facilitating the evaporation of moisture.
By allowing fresh air to flow through your space, you can considerably improve air quality and help reduce humidity levels. This is especially vital in areas where moisture has accumulated, as stagnant air can hinder the drying process.
To maximize effectiveness, keep windows and doors open during the warmest parts of the day when outdoor humidity levels are lower.
Monitor the weather to ensure you’re not inviting additional moisture indoors. Additionally, using fans in conjunction with open windows can further accelerate evaporation, helping you maintain ideal humidity control.
Using Moisture Meters
When evaluating moisture levels in materials after water damage, knowing the types of moisture meters available is essential.
You’ll want to understand how to use each meter effectively to get accurate readings.
Proper usage techniques ensure you can pinpoint moisture content and make informed decisions for drying processes.
Types of Moisture Meters
Understanding the types of moisture meters is essential for effective structural drying after water damage. Choosing the right meter can greatly impact your drying process.
Here are three main types you should consider:
Analog Moisture Meters: These use a needle gauge to indicate moisture levels. They’re straightforward and often less expensive, making them suitable for basic assessments.
Digital Moisture Meters: These provide precise readings and often include features like data logging and Bluetooth connectivity. They’re ideal for professionals needing accurate, real-time data.
Pinless Moisture Meters: These meters utilize electromagnetic signals to detect moisture without penetrating the material. They’re perfect for quick assessments of larger areas without causing damage.
Selecting the appropriate meter can greatly enhance your drying efforts and ensure thorough moisture removal.
Proper Usage Techniques
To effectively utilize moisture meters, start by calibrating the device according to the manufacturer’s instructions.
Verify you’re using the proper equipment for the specific materials you’re testing, as different surfaces may require various settings.
Begin your measurements at the most affected areas, moving systematically to less damaged sections.
Record moisture levels consistently to track drying progress over time.
When employing drying techniques, aim for a balance between airflow and humidity control, adjusting your equipment accordingly based on the readings.
This methodical approach enhances your drying efficiency and fosters a sense of community among those addressing water damage, as accurate data leads to better-informed decisions and collaborative solutions in the restoration process.
Insulating and Heating Affected Areas
As insulation plays a critical role in the drying process, ensuring that affected areas are properly insulated and heated can greatly expedite recovery from water damage.
You’ll want to focus on effective insulation materials and reliable heating methods to create an ideal environment for drying.
Select appropriate insulation materials: Use water-resistant options like closed-cell foam or fiberglass batts to prevent mold growth and facilitate drying.
Implement heating methods: Deploy portable heaters or heat lamps to maintain a consistent temperature in affected areas. This will enhance evaporation rates and speed up drying.
Monitor humidity levels: Utilize hygrometers to keep track of moisture levels. This will help you adjust heating methods accordingly, ensuring a thorough drying process.
Removing Wet Materials
Once you’ve confirmed the affected areas are insulated and heated, the next essential step is removing wet materials promptly.
Begin by identifying all saturated items, including carpets, drywall, and furniture. Use effective removal techniques, such as cutting out damaged drywall and extracting waterlogged carpets. For porous materials, verify you assess their condition—if they’re overly soaked and compromised, disposal might be necessary.
Once you’ve removed the wet materials, it’s imperative to follow proper material disposal guidelines.
Separate salvageable items from those that must be discarded, and adhere to local regulations for hazardous waste. Always wear protective gear during this process to safeguard yourself from mold spores and contaminants.
Efficient removal and disposal aid in drying and minimize the risk of further damage or health issues. By tackling this step methodically, you create a solid foundation for successful structural drying.
Maintaining Air Circulation
While you focus on drying out the affected areas, maintaining air circulation is essential to expedite the evaporation process.
Effective airflow management prevents moisture from lingering, which can lead to mold growth and structural damage.
Here are three key ventilation techniques to implement:
Use Fans: Strategically place high-velocity fans to create a cross breeze, directing air toward wet surfaces. This enhances evaporation rates and speeds up the drying process.
Open Windows and Doors: Allow fresh air to flow in and out of the space. This natural ventilation helps in reducing humidity levels and promotes quicker drying.
Dehumidifiers: Employ dehumidifiers to reduce moisture levels in the air. This is particularly effective in enclosed spaces where airflow might be limited.
Monitoring Drying Progress
To ensure the drying process stays on track, you’ll need to monitor moisture indicators in the affected areas.
Start by using advanced moisture monitoring equipment, such as hygrometers and moisture meters, to obtain accurate readings. Regularly check these devices to assess the progress and verify that moisture levels are decreasing consistently.
It’s essential to document your findings, noting any fluctuations in moisture content. This data will help you identify areas that may require additional drying equipment or adjustments in your drying strategy.
Pay attention to surrounding materials, as their moisture content can affect overall drying efficiency.
You can also utilize thermal imaging cameras to detect hidden moisture pockets that traditional methods might miss.
Frequently Asked Questions
How Long Does Structural Drying Typically Take After Water Damage?
Structural drying typically takes 3 to 7 days, but drying time varies based on several drying factors, such as humidity, temperature, and the materials involved. Keep monitoring conditions for effective results and safety.
Can I Dry My Home Without Professional Help?
Yes, you can dry your home without professional help. Use DIY drying techniques and implement moisture detection tools to assess dampness. However, ensure thoroughness, as missed areas can lead to mold growth and further damage.
What Are the Health Risks of Water Damage?
Water damage can lead to serious health risks like mold growth, which compromises air quality. Imagine breathing in a hidden fog of spores; you wouldn’t want that for you or your loved ones. Stay vigilant.
Will My Insurance Cover the Cost of Water Damage Restoration?
Your insurance coverage might include restoration costs, but it depends on your policy specifics. Review your coverage details, and consult your agent to understand what’s covered and how to file a claim effectively.
How Can I Prevent Future Water Damage in My Home?
Think of your home as a fortress. To prevent future water damage, embrace waterproofing techniques such as sealants and drainage systems, and practice regular maintenance checks to guard against leaks and ensure your castle stays safe.
Review
Effectively drying out a structure after water damage is like orchestrating a symphony; each method plays an essential role in achieving harmony. Just as musicians must stay in sync to produce beautiful music, you need to assess damage, remove water, and ensure airflow works together seamlessly. Neglecting any part of the process risks a crescendo of mold and structural issues. By applying these ten methods diligently, you’ll restore your space with precision and care.
Recent Posts
Swift Mold Solutions After Sewage Backup
When dealing with a sewage backup, swift mold solutions are vital to protect your home
How to Safely Remove Mold After Sewage Backup
When faced with mold after a sewage backup, it’s essential to approach the situation with
What to Do After Sewage Backup and Mold?
After a sewage backup and mold incident, it’s vital to act quickly and methodically. Your